Adjust Your Guitar’s Truss Rod in 12 Easy Steps – A Guide By Zager
Adjusting the truss rod on a guitar can be daunting for many guitar players, especially those new to the instrument. However, truss rod adjustment is an essential skill that every guitar player should know, as it can significantly affect the playability and sound of the device.
A truss rod is a metal rod that runs inside the neck of the guitar and is used to counteract the tension of the strings, which can cause the neck to bow forward or warp. Adjusting the truss rod can help correct issues with the guitar’s action and intonation and improve overall playability.
In this guide, we will walk you through the 12 easy steps to adjust your guitar’s truss rod, so you can confidently maintain and optimize your guitar’s performance.
How Does A Truss Rod Work
When the adjustment screw is tightened or loosened, it bends into its body forwards or backward. Usually, it is helpful to counteract strings pulling on guitar strings whose neck bends in response – it is a great technique. Rods used to string guitars are generally short metal wires running along the central portion of the headstock.
The anchor is attached on one side and adjusted on another. Guitars with adjustable truss rods are common in this market, although its concept does not appear to have come up.
Where Is Your Guitar’s Truss Rod Adjustment?
The truss rod is a crucial guitar component that helps maintain its structural integrity and playability. The truss rod adjustment allows for fine-tuning the truss rod tension, which affects the neck’s relief.
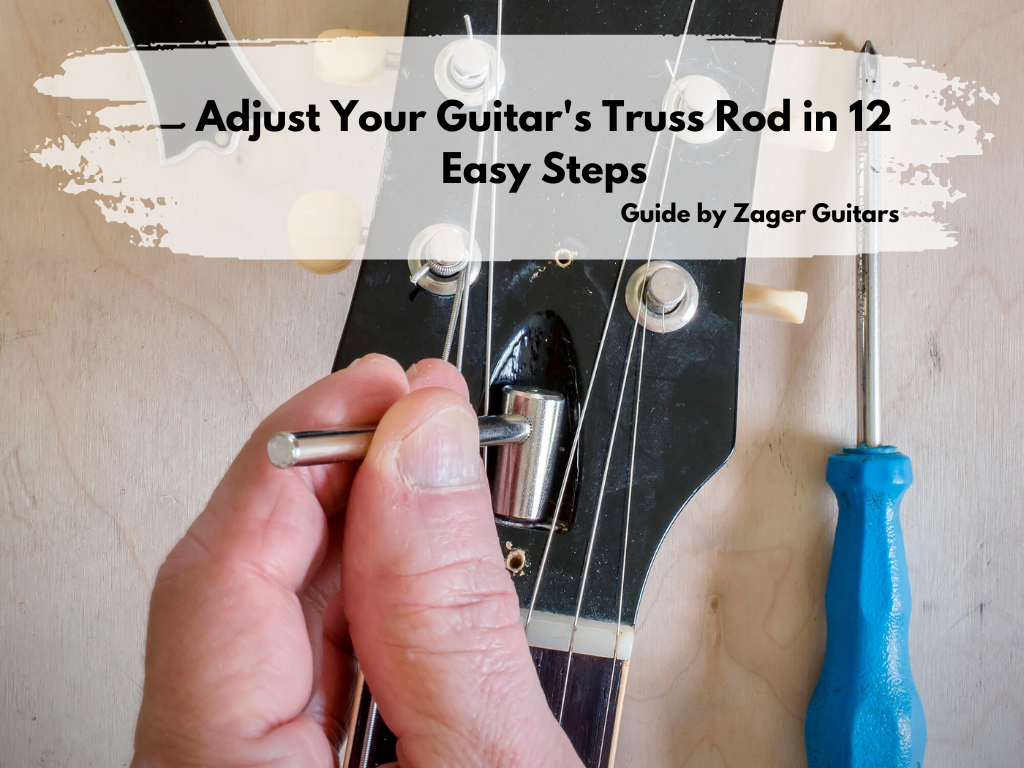
Removing the cover may require special tools, such as an Allen key or a crosshead screwdriver, depending on the type of adjustment nut used. In some cases, the neck must be removed to access the truss rod, making it essential to use the right equipment and follow proper procedures to avoid damaging the guitar.
How To Adjust Your Guitar’s Truss Rod
Accuracy is key when adjusting the truss rod on your guitar. The truss rod plays a vital role in maintaining the proper amount of relief in the neck of your guitar, which in turn affects its playability and intonation. To accurately measure the neck relief, you must tune your guitar to pitch and capo it at the first fret. This removes the nut from the equation and ensures a more precise measurement.
Next, you’ll want to suppress the 12th and seventh fret on the low E string, which allows the string to act as a straight edge. This helps you to determine the amount of relief between the top of the 6th fret and the bottom of the string, which should ideally be around .02 inches or the thickness of a business card. You can use a feeler gauge to measure this distance accurately.
If you find little to no space between the top of the 6th fret and the bottom of the string, or the neck is back-bowed, you’ll need to loosen the truss rod until you achieve the ideal amount of relief. This involves turning the truss rod wrench counterclockwise and retuning the neck bows of the guitar after every half-turn.
On the other hand, if there is excessive space between the top of the 6th fret and the bottom of the string, you’ll need to tighten the truss rod. This involves clockwise turning the truss rod wrench and retuning the guitar after every half-turn.
It’s important to remember that each guitar truss rods are unique and may require different adjustments to achieve optimal relief. With some patience and practice, you can confidently adjust your truss rod and keep your guitar playing at its best.
Does Tightening The Truss Rod Straighten The Neck?
Regarding guitar maintenance, one of the most common questions guitarists ask is whether tightening the truss rod will straighten the neck. The answer depends on the specific situation and the adjustment needed.
Firstly, it’s essential to understand what a guitar truss rod is. A truss rod is a metal rod that runs through the length of the guitar neck, providing support and stability to the neck. The truss rod has a nut located at the headstock end of the guitar, which can be adjusted by turning the truss rod bolt around it clockwise or counterclockwise using an Allen wrench.
If the guitar neck has a concave bow, meaning the neck’s middle dips lower than the ends, then tightening the truss rod nut clockwise can straighten the neck. The truss rod pulls the neck inwards, counteracting the bowing effect.
However, it’s important to make minor adjustments and re-tune the guitar after each adjustment to avoid over-tightening the truss rod and causing damage to the neck or fretboard.
Conversely, if the guitar neck has a convex bow, meaning the middle of the neck is higher than the ends, loosening the truss rod nut counterclockwise can straighten the neck. This is because the truss rod nut counter then releases tension on the neck, allowing it to straighten out.
It’s important to note that adjusting the truss rod should be done cautiously.
Can You Damage The Guitar By Adjusting Truss Rod?
Yes, it is possible to damage a guitar by adjusting the truss rod incorrectly.
The truss rod is an essential component of the guitar that helps to counteract the tension of the strings and keep the neck straight. If the truss rod is not adjusted correctly, it can cause the neck to warp, resulting in high action (strings too far from the fretboard) or low action (strings too close to the fretboard), making the guitar difficult to play.
To avoid damaging the guitar, it is essential to use the proper tools and follow the manufacturer’s instructions when adjusting the truss rod. It is also recommended to make minor adjustments at a time and to let the guitar settle for a few hours before making additional adjustments.
If you are unsure about how to adjust the truss rod, it is best to seek the assistance of a professional guitar technician. Zager Guitars have an elaborate video in this regard.
Step-By-Step Guide To Adjusting The Truss Rod
These 12 steps are crucial in performing a basic setup, and they follow the same sequence as those carried out by a professional repair shop. Each procedure will be briefly outlined, along with the necessary tools, and we will provide instructions on executing them.
- Adjust The Truss Rod
An adjustable truss rod, which runs along the length of the neck to counteract the string tension and maintain the neck’s straightness, is a feature found in the earliest necks of most acoustic and electric steel-string guitars built after the mid-1970s.
If the truss rod is loosened, the strings pull the neck into a forward bow, resulting in fret buzz, higher action, or greater distance between the strings and the fretboard. Conversely, tightening the truss rod creates a back bow, moving the strings closer to the fretboard. The adjustable end of the truss rod, a male or female nut, is typically located beneath the truss-rod cover on the headstock. It is worth noting that classical guitars, which use nylon strings, do not generally have truss rods.
When the guitar’s neck is straight, a small gap between the strings and the frets in the middle of the neck is wide enough to fit a piece of paper or a business card. If the instrument’s neck has an excessive bow, known as relief, the gap will be more comprehensive, and the truss rod must be tightened. If the neck has a back bow, the strings will rest flat against the frets, and the truss rod must be loosened.
- Adjust The Bridge Height
Adjusting a guitar’s action can also involve making changes to the bridge. This most proper adjustment can be accomplished on an electric guitar by turning the relevant screws. While on an acoustic guitar, adjustments may require shimming or sanding of the bridge saddle. After adjusting the truss rod and bridge, the guitar should be tested for a clear tone.
Listen for buzzes and false notes—for instance, playing style here, fretting an E note or bending to what should be an E, and hearing an F.
Excessive buzzing and widespread false notes mean you’ve dropped the bridge too low or excessively counter-bowed the bottom-up bow neck. If so, go back and check your work. One or two false notes on an otherwise well-adjusted guitar indicate an improperly crowned fret, something best corrected by a skilled tech.
- Check The Nut Height
After fine-tuning the truss rod and bridge, the final stage of adjusting the action begins. While most guitar nuts are now manufactured to high standards, there are cases where even expensive production guitars have poorly cut nut slots that are either too high or too low.
If the open guitar strings produce a buzzing sound, the slot for that string is low, and the nut needs to be raised with a shim. However, this also means the other slots must be deepened to maintain balance. If no issues are found, the pitch should be checked using an electronic tuner. If a space is too high, notes at the first fret will sound sharper than they should by about 10 to 15 cents, requiring the places to be deepened.
This is generally denoted as fret buzzing. This process requires significant skill and precision, and using a set of nut files is essential for a skilled luthier. Shaping nut slots properly demands a high level of craftsmanship.
- Check The Electronics
Are the switches on your guitar making snapping, crackling, or popping sounds? Does performing a volume swell produce a noise that sounds like frying bacon? A complete guitar setup involves inspecting its electronics.
This includes checking the battery on amplified acoustics and guitars with active pickups and replacing it if needed. All nuts and screws that secure the guitar’s electronics should be tightened. An essential tool in this regard is the electronic contact cleaner (available at any electronics store), various screwdrivers, socket wrenches, wrenches, or adjustable open-end wrenches.
The contact cleaner can include a nozzle extension that lets you spray any area where dirt or oxidation may cause a noisy connection. Additionally, you should spray the openings of the volume and tone pots next to the solder lugs and directly onto all switches.
Quickly flick each switch or twist each knob back and forth, and then play for a period while listening for any lingering noises. This process should be repeated if necessary. You can use the tongue test to test nine-volt batteries: if the terminals produce a tingle on your tongue, the battery functions correctly.
- Change The Strings
Before changing the strings on your guitar, you should make all the above adjustments. The only circumstance in which you should adjust the truss rod, bridge height, and nut slots with new strings in place is when transitioning to a different gauge. Otherwise, it is recommended to have two sets of strings, one for adjustments and one for playing.
In most electric guitars and some acoustics, the strings are held in place by passing through the bridge or tailpiece and secured by the tension on the string’s ball end. However, steel-string acoustics use bridge pins to hold the strings, and it is crucial to align the slot in the bridge pin with the string and pull up on the string while pushing down on the bridge pin.
On the other hand, nylon-string guitars require weaving the string through the bridge, then looping it in an under-and-over knot. To properly wrap the strings around the tuning posts, pass the string through the center and leave an inch of slack. Hold the speaking length of the string tightly and wrap the free end around the post in the opposite direction to that in which it will wrap when tightened.
Wrap the string beneath the speaking length and then wrap the free end over and around the speaking size before giving it a downward tug. Once the guitar is almost in tune, give each string a gentle tug along its length, including the sections between the tuners and the nuts and the bridge saddle and tailpiece. Additionally, give each string a series of whole- and half-step bends.
This method will settle steel-string acoustics and electrics to within 20 cents of their correct pitch, while nylon-string guitars may require one or two more tunings over two hours to reach the correct pitch. Finally, the strings can be clipped with a wire cutter or coiled neatly.
- Check The Tuning Machine Hardware
When guitar tuners are tightened with tension, they may feel sturdy. However, when the strings are removed, numerous loose nuts and screws may be comparable to those found in a bizarre and chaotic environment.
To improve tuning stability, try gently wiggling the components of the guitar’s tuners. Most tuners feature a nut on the face of the headstock and a small screw on the back, both of which can be tightened using an appropriately sized screwdriver.
Additionally, some tuners may have a small screw on the crown of the tuning button, which can be tightened or loosened to adjust the tension. For open-gear tuners, which allow the gears to be seen, applying a drop of light oil to each mechanism can help. Closed-gear tuners can also benefit from a drop of oil down the shaft.
- Clean And Polish The Frets
Cleaning and polishing a guitar is a simple process that can be completed quickly and is not as complex as significant fret surgery, such as a “crown and polish.” This routine maintenance task typically only takes five minutes but can leave your guitar looking and playing like it’s brand new. If you encounter significant buildup on the fret wire, refer to step 8 for guidance on removing it.
To begin polishing the guitar, open the can of metal polish and remove a small piece of chemically impregnated fibrous cloth. Rub the fabric across each fret and observe the disappearance of any dullness. Any excess polish can be wiped away using a paper towel or rag.
- Clean And Oil The Fret Board
Just like polishing the frets, this is easy-to-do housecleaning-level work.
If the frets and fretboard of your guitar are excessively dirty, you can start by using a small amount of Windex to dissolve the toughest dirt and grease. You can use a guitar pick or a sharpened Popsicle stick to remove the grime that accumulates around the frets and directly below each string.
Next, apply a thin layer of lemon oil and use a paper towel to wipe away any excess. It’s also a good idea to apply a little oil occasionally to the unfinished wood bridge found on most acoustic guitars.
- Inspect for Structural Problems
Like how string tension can conceal loose tuning gears, it may also hide loose joints and cracks in a guitar. Loose neck-joint screws can occasionally occur in bolt-neck electric guitars, and acoustic guitars may experience broken or unglued braces.
For bolt-neck electric guitars, twisting the neck and checking if it wiggles is advisable. If there is any looseness, the bolts at the neck-body joint should be tightened. For set-neck electrics, such as solid body and semi-hollow body guitars, the likelihood of cracks is low, but it is still necessary to conduct a thorough inspection, focusing on problematic areas such as the neck joint and the section of the headstock behind the nut.
When checking acoustic guitars, it is recommended to use an automotive or dental inspection mirror along with a small flashlight. It is essential to carefully examine the sound hole and feel for any loose or squeaky braces. If any suspicious issues are discovered, it is advisable to consult a luthier.
- Adjust The Pick-Up Height
Here’s a modification that many people may not be aware of, which can significantly alter the sound of your electric guitar. If you have a delicate touch or desire a slightly fuller, more midrange-focused tone that compresses your signal, you can achieve this by moving the pickups closer to the strings.
To begin with, adjust one pickup to your liking. Plug in your guitar and play with a favorite CD while using the height adjustment screws on either side of the pickup to adjust its height up or down. Avoid adjusting the pole pieces on the pickup itself, as certain pickups with strong magnetic fields can create an out-of-tune fluttering sound when positioned too close to the strings. After each adjustment, play along the entire fretboard, listening carefully to achieve the desired sound.
Next, balance the pickups by fretting the 1st and 6th strings individually, at the highest fret, about the same distance from the bridge to the bridge pickup as from the highest fret to the neck pickup. Play each string as you switch between pickups, and ensure the pickups’ sounds are nearly identical. Alternatively, you can bring one pickup closer to the strings to make it stand out.
Finally, adjust for string-to-string balance by playing the 1st and 6th strings together at different points along the fretboard, ensuring that the strings have equal volumes at all points. You will slightly angle each pickup away from the thicker strings to achieve this balance.
- Set The Intonation
Correct intonation refers to a string producing the appropriate pitch at each fret along its length. To adjust intonation, the size of the string is either increased or decreased at the bridge.
To check the intonation, tune a new set of strings to pitch and play each string at the 12th fret, comparing the pitch with an electronic tuner. It should match the open string’s pitch.
If the fretted note is sharp, the saddle must be adjusted to increase the string’s speaking length, whereas a flat note requires the saddle to be changed to shorten the length. A slight adjustment of 1/16th of an inch can produce a noticeable difference.
It is important to note that if you own a guitar with a floating tremolo system, such as a Floyd Rose, it is best to leave the job to an experienced repair technician. Additionally, some acoustic guitars have non-adjustable saddles.
- Clean And Polish
The final step is to clean and polish the guitar to give it a pristine appearance, enticing the player to pick it up and start playing. For significant grime buildup, Windex can be used to clean the guitar. Next, apply guitar polish to a rag, using only a tiny amount for each surface, and be careful to avoid spreading it to the fretboard (unless it is lacquered) and any moving components.
Shop with Zager
The perfect tool to perform truss rod adjustments easily and quickly. Fits all Zager Guitars perfectly. Included FREE with all Zager Guitar orders. Currently in stock for $10.
FAQs
Which Way Do You Turn Truss Rod To Lower Action?
Turn the rod nuts counterclockwise. Truss rod are over-strong: A truss rod’s back turns in the opposite direction. This decrease in string width increases string buzzing. Turn the screw counterclockwise for this purpose.
Which Way Do You Turn Truss Rod To Increase Relief?
You can loosen or turn truss rod nuts counterclockwise to reduce neck pain.
Is It Okay To Adjust Truss Rod With Strings On?
It’s only necessary to remove the guitar trusses from your rig before adjusting it for tightening. When tension is increased, the tension is added, which may damage the string. Tell us the reason. If we are removing our string, it’s okay.
How Do You Know If Your Guitar Needs A Truss Rod Adjustment?
You need to do one thing unless you are experiencing truss rod problems. The fret is bent in the opposite direction when your guitar’s neck has turned downward toward it.